Unlocking the Secret to Superior Sweetness: Master Homemade Golden Oreos
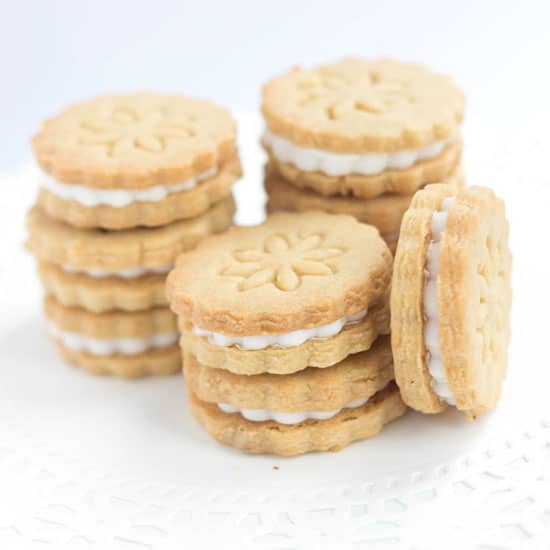
There's a universally acknowledged truth in the world of desserts: while store-bought treats offer convenience, nothing quite compares to the sublime taste and texture of a homemade creation. This holds especially true for one of America's beloved vanilla sandwich cookies – the Golden Oreo. Imagine biting into a delicate, buttery vanilla cookie, perfectly crisp yet yielding, cradling a cloud of sweet, fluffy vanilla buttercream. That, my friends, is the magic of homemade golden oreos, a dessert experience that elevates beyond anything you'll find in a package.
For many, the Golden Oreo is a "cookie weakness," a nostalgic treat that conjures up childhood memories. But what if we told you that the homemade version isn't just a pale imitation, but an undeniably superior indulgence? It’s true. These vanilla creme sandwich cookies boast a depth of flavor and a melt-in-your-mouth quality that simply can't be replicated on an industrial scale. Prepare to be obsessed, because once you taste your own masterfully crafted Upgrade Your Dessert: Homemade Golden Oreos Beat Store-Bought.
What Makes Homemade Golden Oreos So Special?
The allure of homemade golden oreos lies in their exquisite balance of simplicity and sophistication. At their core, they are a delicious vanilla sandwich cookie, but the homemade touch transforms them into something truly extraordinary. Here's why they stand head and shoulders above their store-bought counterparts:
- Unrivaled Freshness & Flavor: When you bake at home, you control the ingredients. Fresh, high-quality butter, pure vanilla extract, and precise baking times result in cookies that are fluffier, richer, and bursting with authentic vanilla essence. The difference is palpable – a delicate aroma and a clean, buttery finish that's often lost in mass-produced versions.
- Perfect Texture Harmony: The ideal Golden Oreo offers a slight crispness at the edges, giving way to a tender, crumbly interior. Our homemade recipe aims for this exact texture, ensuring the cookie base isn't dense or dry, but rather light and perfectly complements the creamy filling.
- Customizable Creaminess: The heart of any great sandwich cookie is its filling. While store-bought fillings can be overly sweet or waxy, a homemade buttercream is a revelation. You can adjust the sweetness, the consistency, and even add subtle flavor notes to create a truly bespoke experience.
- The Joy of Creation: There’s immense satisfaction in baking a beloved treat from scratch. It’s a rewarding process that culminates in a dessert you can proudly share with family and friends, knowing every ingredient was chosen with care.
Interestingly, some regions, particularly in Western Pennsylvania, refer to many sandwich cookies as "gobs." Traditionally, a gob is a cake-like chocolate sandwich cookie with a sweet vanilla icing. While gobs are delicious in their own right, the homemade golden oreos we're talking about lean more towards a true cookie texture, offering that classic snap before melting into a tender crumb, all with a delightful vanilla focus. After much trial and error, we believe this recipe truly nails that perfect vanilla cookie experience.
The Essential Ingredients and Tools for Your Golden Oreo Journey
One of the beauties of making homemade golden oreos is that the ingredients are straightforward and likely already in your pantry. However, a few key considerations will make all the difference in achieving that "better than store-bought" status.
Must-Have Ingredients:
- High-Quality Butter: This is non-negotiable. Butter provides a wonderful depth of flavor and contributes significantly to the cookie's tender texture. For optimal results, use unsalted butter so you can control the salt content.
- Granulated & Brown Sugar: A combination of both white and brown sugars is often the secret to perfectly balanced cookies. Granulated sugar contributes to crispness, while brown sugar adds moisture, chewiness, and a subtle caramel note, enhancing the "golden" flavor profile.
- All-Purpose Flour: The backbone of your cookies. Measure it correctly – too much flour can lead to dry, dense cookies.
- Eggs: Act as a binder and add richness and structure.
- Pure Vanilla Extract: Since vanilla is the star, don't skimp here. A good quality pure vanilla extract will shine through beautifully.
- Baking Powder & Baking Soda: These leavening agents give the cookies their ideal light and slightly fluffy texture.
- Powdered Sugar: Essential for the luscious vanilla creme frosting.
- Milk or Cream: Used in the frosting to achieve the perfect consistency.
- Optional: Golden Syrup: For an even richer, deeper caramel-like taste, some recipes incorporate golden syrup into the cookie dough. If you can find it, a tablespoon or two can add an extra layer of complexity, but it's not strictly necessary for a fantastic cookie.
Crucial Tool & Technique Tip: Room Temperature Butter
One of the most frequently asked questions in baking is, "Does your butter need to be at room temperature for cookies?" The answer is a resounding yes! This seemingly small detail makes a significant impact on your cookie's final texture. Butter that is too cold won't cream properly with sugar, leading to a dense cookie. Room temperature butter, on the other hand, creams effortlessly, incorporating air and creating a light, fluffy, and tender crumb.
Forgot to take your butter out? Don't despair! You can speed up the process by cutting the cold butter into small cubes and letting it sit on the counter for 15-20 minutes. Alternatively, you can microwave it on very low power (e.g., 10% for 10-15 seconds) but be extremely careful not to melt it. You want soft, pliable butter, not liquid butter.
Recommended Baking Tools:
- Stand mixer or hand mixer
- Mixing bowls
- Measuring cups and spoons
- Rubber spatula
- Baking sheets
- Parchment paper (for non-stick baking and easy cleanup)
- Cookie cutters (round, for classic Golden Oreo shape)
- Piping bag and round tip (for a professional-looking frosting swirl, optional)
Crafting Perfection: Step-by-Step Homemade Golden Oreos
Making these homemade golden oreos is a rewarding process. Breaking it down into two main components – the vanilla cookie and the creme filling – makes it even more manageable.
The Vanilla Cookie Base:
- Cream Butter and Sugars: In a large mixing bowl, cream together the softened room temperature butter with both granulated and brown sugars until light and fluffy. This step is crucial for incorporating air and creating that tender texture.
- Add Wet Ingredients: Beat in the eggs one at a time, ensuring each is fully incorporated before adding the next. Stir in the pure vanilla extract.
- Combine Dry Ingredients: In a separate bowl, whisk together the flour, baking powder, baking soda, and salt.
- Gradually Combine: Slowly add the dry ingredients to the wet ingredients, mixing on low speed until just combined. Be careful not to overmix, as this can develop the gluten too much, leading to tough cookies.
- Chill the Dough (Optional, but Recommended): For easier handling and to prevent excessive spreading, wrap the dough in plastic wrap and chill it in the refrigerator for at least 30 minutes, or up to an hour. This step also allows the flavors to meld.
- Roll and Cut: On a lightly floured surface, roll out the chilled dough to about 1/4 inch thickness. Use a round cookie cutter (or even the rim of a small glass) to cut out your cookie shapes.
- Bake: Place the cut-out cookies on baking sheets lined with parchment paper. Bake in a preheated oven until the edges are lightly golden and the centers are just set. Baking times will vary, so keep a close eye on them to prevent over-browning. Let them cool completely on a wire rack before frosting.
The Luscious Vanilla Creme Filling:
While some recipes might suggest a shortcut with store-bought fondant, we highly recommend a classic homemade buttercream for that truly "fluffier and tastier" experience that defines homemade golden oreos.
- Cream Butter: In a clean mixing bowl, beat softened room temperature butter until light and creamy.
- Add Powdered Sugar: Gradually add powdered sugar, a cup at a time, beating well after each addition until smooth.
- Incorporate Vanilla & Liquid: Beat in pure vanilla extract and a tablespoon or two of milk or cream, until the frosting is light, fluffy, and spreadable. Adjust the liquid amount as needed to reach your desired consistency.
- Assemble: Once your vanilla cookies are completely cool, spread or pipe a generous dollop of the vanilla creme frosting onto the flat side of one cookie. Gently top with another cookie, pressing lightly to create your perfect vanilla sandwich cookie.
Tips for Success and Storage
- Precision is Key: Baking is a science. Measure your ingredients accurately, especially flour. Using a kitchen scale for flour, sugar, and butter can drastically improve consistency.
- Don't Rush the Cooling: Ensure your cookies are completely cool before attempting to fill them. Warm cookies will melt your beautiful buttercream, leading to a messy disaster.
- Even Thickness: Aim for cookies of uniform thickness when rolling out the dough. This ensures even baking and makes sandwiching them much neater.
- Make It Your Own: Don't be afraid to experiment! A hint of lemon zest in the cookie dough, almond extract in the frosting, or even a touch of food coloring for a festive look can add a personal touch to your homemade golden oreos.
Freezing These Delicious Sandwich Cookies:
If you're looking to prepare ahead or simply want to extend the life of your homemade golden oreos, freezing is an excellent option. However, for the best results, we recommend freezing the cookies unassembled. This preserves the texture of the cookies and ensures your frosting is always fresh.
- Freeze Unsandwiched: Once the baked vanilla cookies have cooled completely, arrange them in a single layer on a baking sheet and freeze until solid (about 1-2 hours).
- Store in an Airtight Container: Transfer the frozen cookies to an airtight freezer-safe container or bag. They can be stored for 1-2 months.
- Thaw and Assemble: When ready to enjoy, simply remove the desired number of cookies from the freezer and let them thaw at room temperature for an hour or two. Then, prepare your fresh vanilla creme frosting and assemble your delicious sandwich cookies as usual. While you technically *can* freeze frosting, making it fresh yields the best taste and texture.
Once you've tasted these, you'll understand why they'll become Your Family's New Favorite: Delicious Homemade Golden Oreos.
Conclusion
Diving into the world of homemade golden oreos is more than just baking a cookie; it’s about crafting a delightful experience. From the rich, buttery vanilla cookies to the dreamy, sweet creme filling, every element comes together to create a treat that far surpasses any store-bought version. The satisfaction of baking these from scratch, coupled with their irresistible taste, makes them a perfect project for any baker, whether you're new to the kitchen or a seasoned pro. So roll up your sleeves, gather your ingredients, and prepare to master this delicious vanilla sandwich cookie that will undoubtedly become a treasured family favorite.
